RayJackONE - Visual identification of dangerous objects
2021-07-17 14:44:04
One of the first steps in the stray light analysis of an optical system is to identify its dangerous objects, which fulfill the following two conditions:
· They are illuminated by the stray light source (“illuminated objects”),
· They can be seen from the detector (“critical objects”).
From a dangerous object, stray light can reach the detector by a single scattering process. In most cases, these objects are the main contributors to stray light – which explains their name.
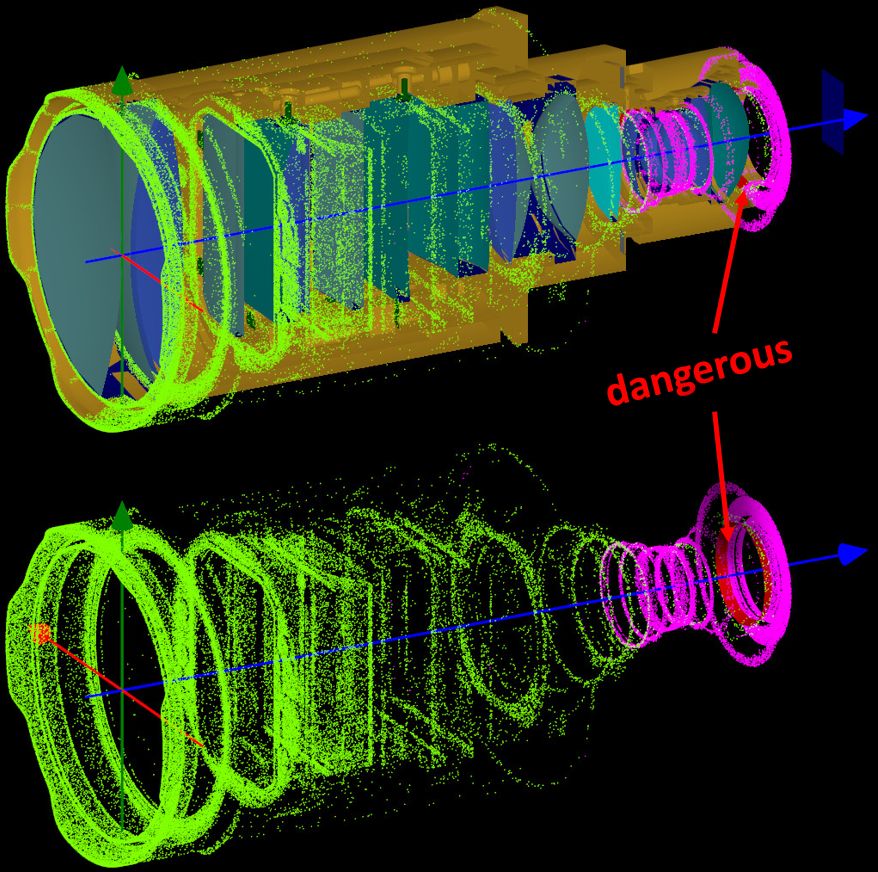
In RayJack ONE® it is very simple to display the hit points of rays on the critical and the illuminated objects. This helps identify the dangerous objects visually. We exemplify this with a high-performance anamorphic lens made by Glaswerk Optics in Germany
The optical and mechanical parts were imported from Zemax and CAD, respectively.
In the figure below, the green spots indicate illuminated objects and the magenta spots critical objects. The overlap regions which include spots of both colors define the dangerous objects (red surface). By rotating, shifting and scaling the 3D view or by removing objects, you can get a clear overview over the situation. If more than one stray light source is present, you can overlay spots of several independent simulations or even import point clouds from external resources to perfectly visualize the stray light situation.
Depending on this visual assessment, you can decide whether to enter a more detailed stray light analysis right away or whether it is better to first re-design the mechanical construction to remove the most prominent dangerous objects. The current example system is very well-designed with respect to stray light: critical and illuminated objects are well separated, so that no major re-design is to be expected.